 Thanks for connecting!


Pragya Sharma
15 min read
June 28, 2024


Table of Contents
-1.jpg)
Poorly organised Revit groups and families are a common cause of slow model performance, coordination errors, and avoidable rework in BIM projects. When elements are created without clear standards, models become heavy, difficult to manage, and challenging for teams to collaborate on efficiently. As projects scale, these issues often multiply, leading to longer review cycles and higher coordination risks.
Structured Revit standards help prevent these problems by ensuring consistency, better control over elements, and smoother collaboration across disciplines. Understanding when to use families versus groups, and how to organise them correctly, plays a critical role in long-term BIM success.
This article explains best practices for organising Revit groups and families to improve BIM model performance, consistency, collaboration, and long-term project scalability.
What is Revit?
This section introduces Revit as a BIM authoring tool and explains how families and groups are used to manage model elements across disciplines.
Revit is a BIM software developed by Autodesk. It is used by AEC (Architecture, Engineering, and Construction) professionals for creating detailed and accurate 3D models of buildings and infrastructure.
Revit supports multidisciplinary collaboration by allowing users to work on a shared model, facilitating better coordination and reducing errors during the design and construction phases. The software offers tools for design, analysis, and documentation, enabling users to produce comprehensive project deliverables. With features like parametric components, dynamic documentation, and integrated analysis, Revit enhances the efficiency and precision of the building design process, making it an integral part of modern architectural and engineering practices.
Revit Families v/s Revit Groups: What is the Difference? 
This section clarifies the functional differences between Revit families and Revit groups to help users select the correct method for modelling control and efficiency.
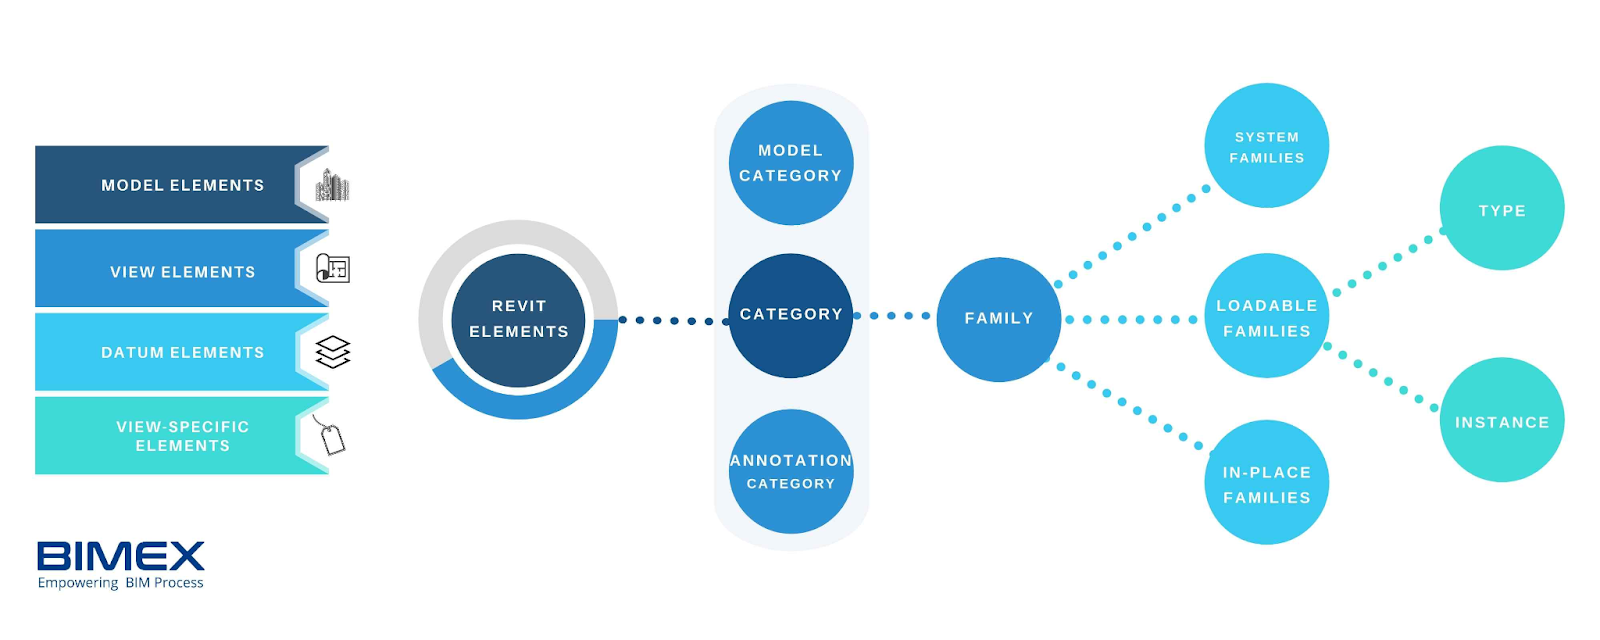
The two integral elements of Revit software are Revit families and Revit groups. These features enhance the software’s performance and usability. Look below at the table to understand the fundamentals of Revit families and Revit groups:
|
Parameter |
Revit Family |
Revit Group |
|
Definition |
It is a predefined element representing specific building components. |
It is a collection of elements grouped to form a single unit within a project. |
|
Application |
It is used for individual building components across multiple projects. |
It is used for managing repetitive configurations of elements within a single project. |
|
Customization |
Highly customisable using the Family Editor, with parameters, constraints, and relationships. |
Simple to create and edit; customisation is limited compared to families. |
|
Types |
System Families, Loadable Families, In-Place Families. |
Model Groups, Detail Groups. |
|
Examples |
Doors, windows, furniture, structural elements, and mechanical components. |
Apartment layouts, repeated room configurations, and clusters of annotated elements. |
With an overview of the topic, let’s now delve individually into the details of Revit families and Revit groups.
What are the Different Types of Families in Revit?
This section explains system, loadable, and in-place families in Revit and how each type impacts model structure, reuse, and performance.
Families in Revit are clusters of elements with a common set of properties, a related graphical representation, and a standardised behaviour. The three primary types of families in Revit include:
1. System Families
System families are predefined in Revit and cannot be loaded or created by the user. These families include essential building elements that are integral to the structure and model functionality. Elements such as walls, floors, roofs, ceilings, and staircases belong to system families. These are used to define the core building elements that form the structure of a Revit model. They can be modified through the project’s properties and settings rather than through a separate family editor.
2. Loadable Families
Loadable families are created outside of the project environment using the Family Editor and can be loaded into a project as needed. These are typically used for building components that require customisation and can be reused across multiple projects. Some examples of loadable families include doors, windows, furniture, lighting, and mechanical equipment. They are used for components that need to be customised and reused. They are created or downloaded, modified as necessary, and then loaded into the project. These families are highly flexible and can have various parameters to control their appearance and behaviour.
3. In-Place Families
In-place families are created directly within the project environment for unique or one-off elements that are specific to a particular project. These families are used when a custom element is required, but it does not need to be reused in other projects. Customised furniture and sculptural elements are examples of in-place families. In-place families are ideal for creating custom elements that are unique to the project. They offer the flexibility to model complex shapes and forms directly within the project context. However, they are not intended for reuse in other projects.
Also Check out: The Ultimate Guide to Revit: Key Features, Applications, Benefits, and Plug-Ins (2026)
Top 4 Tips to Organise Revit Families for Architects and Engineers
This section outlines structured methods for organising Revit families to maintain consistency, scalability, and efficient BIM workflows.
Revit families are a pivotal tool in shaping BIM models. They help in saving time and effort, thus streamlining processes. Mentioned below are four hacks that professionals can use to organise Revit families:
1. Establish a Hierarchy
To maintain a well-organised and efficient Revit model, follow a hierarchy of good families. This involves creating families with appropriate naming conventions, effective categorisation, and consistent parameters. Here’s more about how this helps:
- Naming conventions mean using descriptive and standardised names for families and their types, making it easier to find and understand each family’s purpose.
- Logical categorisation involves organising families into logical categories, such as doors, windows, furniture, and mechanical equipment, which helps in quickly locating and managing families.
- The use of consistent parameters ensures that similar families have harmonious parameters to facilitate easy modifications and scheduling, aiding in maintaining uniformity across projects.
2. Develop a Central Library
Centralised storage involves storing all Revit families in a universally accessible location such as a network drive or a cloud-based storage solution. This ensures that all team members can access the latest versions of families. Additionally, structured folders help in organising the central library based on categories and subcategories like architectural, structural, MEP, and annotation families, with subfolders for specific types like doors, windows, and furniture. Further, regularly updating the central library by reviewing and updating families, removing obsolete families, and replacing them with updated versions ensures consistency and accuracy. This saves time and reduces errors by providing a single source of truth for Revit families.
3. Organise Family Libraries
While creating a library is important, it is also essential to streamline the families. So, users must load only what they need for a specific project to keep their model lean and efficient. Using type catalogues to manage different variations within a single family file helps reduce the number of files and makes it easier to handle the different versions. Also, leveraging the Project Browser to organise and manage families within your project by grouping families by category and subcategory can help in easy navigation. Such proper organisation within Revit ensures that families are accessible and manageable during the modelling process.
4. Use Revit Plugins for Effective Management
The use of Revit plugins can significantly enhance your ability to manage families by providing additional functionality and automation. For instance, the BIM Manager Suite offers various features for managing families, including batch loading, editing, and exporting families. Another example is the Family Loader plugin that allows users to quickly load multiple families into their project, saving time and reducing manual effort. Additionally, the Family Browser tool provides an intuitive interface for browsing and managing families, making it easier to find and load the right family for the project.
What are the Different Types of Revit Groups?
This section explains model groups and detail groups in Revit and identifies their appropriate use cases within BIM projects.
Revit groups simplify the design process by allowing users to cluster elements that frequently appear together. There are two fundamental types of Revit groups as mentioned below:
1. Model Groups
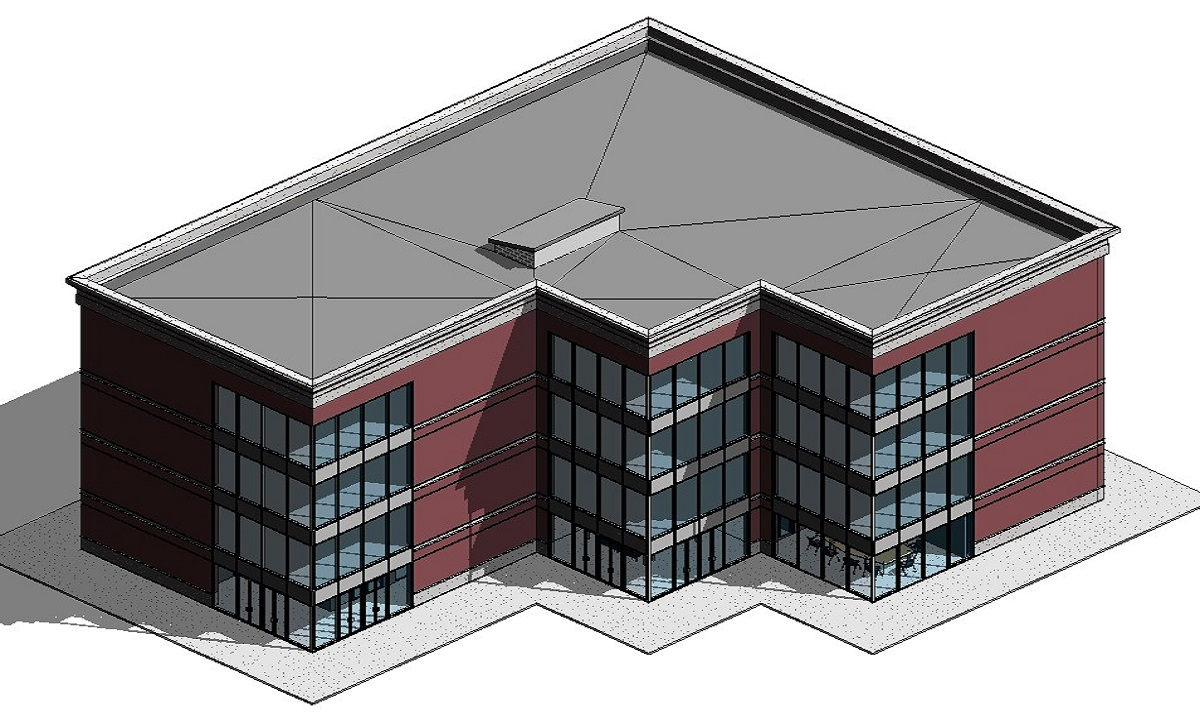
Model groups are collections of modelling elements that are put together. These include walls, doors, windows, furniture, and design or structural components. They are useful for repeating design elements across a project. For instance, in a multi-story building, you can create a model group for a typical floor layout and replicate it across all floors.
2. Detail Groups
Detail groups are used for 2D elements such as annotations, detail lines, and detail components. These groups ensure that detailed 2D drawings, often repeated in various project parts, maintain consistency. For instance, a typical wall section detail can be grouped and reused across multiple sheets.
%202.jpg?width=767&height=168&name=BIM-AC(Course%20Banner)%202.jpg)
How to Create a Group in Revit 
This section explains how to create, name, and manage Revit groups while avoiding common setup errors that affect coordination.
Here’s a step-by-step guide to creating a Revit group:
1. Select the elements you want to include by clicking on them while holding the Ctrl key for multiple selections.
2. Once the desired elements are highlighted, navigate to the "Create" panel on the ribbon and select "Group" from the drop-down menu. You will then be prompted to name their group.
3. It is vital to choose a descriptive name for easy remembrance and identification during the modelling process.
4. After naming the group, click "OK," and their selected elements will be grouped. This new group can now be copied, moved, and modified as a single unit.
Top 6 Revit Groups Best Practices for Efficient BIM Modelling 
This section provides structured rules for using Revit groups effectively to prevent performance issues and coordination conflicts.
Revit groups are a significant tool for improving the speed and quality of models. Let’s explore the best Revit group practices that professionals can use for efficient BIM modelling:
1. Use Clear and Consistent Naming Conventions
When creating groups, it is important to have descriptive and consistent names that indicate their purpose or location. For instance, instead of naming a group "Group 1," opt for "Ground Floor Bathroom" or "Office Partition." This practice makes it easier for team members to understand and locate groups quickly, reducing the chances of errors and confusion.
2. Limit Group Complexity
While it's tempting to group numerous elements, overly complex groups can lead to performance issues and difficulties during editing. Keep your groups as simple as possible by limiting the number of elements within each group. To quote an example, create separate groups for different components, such as walls, furniture, and fixtures, instead of combining them all into one large group.
3. Restrict Group Nesting
Nesting groups or placing one group within another can be useful but should be done sparingly. Excessive nesting can complicate your model and lead to performance slowdowns. When nesting is necessary, limit the nesting levels to keep your model manageable. For instance, a model group for a typical apartment unit might contain nested groups for the kitchen, bathroom, and living room, but avoid further nesting.
Also Check out: Benefits of Using Revit in Architecture, Civil Engineering and MEP
4. Audit and Purge Unused Groups
Throughout a project, you may create groups that are no longer in use. So, it is essential to regularly audit your model to identify and remove these unused groups. Revit's "Purge Unused" tool helps clean up your project and maintain its efficiency. This practice ensures that your model remains lean and performs optimally.
5. Leverage Attached Detail Groups
The attached detail groups allow you to associate 2D detail elements with 3D model groups. This feature is especially useful for ensuring that annotations, detail lines, and other 2D components are consistently applied wherever the model group is used. For example, attaching detail groups to a model group of a typical bathroom layout ensures that all related annotations and details move and update together with the model group.
6. Coordinate with Team Members
Effective communication and coordination with your team members are essential when working with groups. Professionals must establish clear protocols for creating, naming, and modifying groups to ensure everyone is on the same page. Additionally, using Revit's work-sharing features to manage group ownership and avoid conflicts. Regular team meetings to discuss group usage and any necessary changes can also help maintain a cohesive and efficient modelling process.
Common Mistakes to Avoid When Using Revit Groups
This section highlights frequent Revit group-related mistakes that reduce model performance, cause coordination issues, and impact long-term BIM stability.
Even experienced users often misuse Revit groups, leading to unnecessary performance and coordination challenges. Understanding these mistakes helps teams maintain cleaner and more reliable models.
The most common issues include:
- Overloading groups with too many elements, which increases file size and slows down model operations
- Using groups where families would provide better control and flexibility
- Excessive nesting of groups, making edits complex and error-prone
- Inconsistent naming conventions that confuse team members during coordination
- Failing to remove unused groups which leads to cluttered and inefficient models
Avoiding these mistakes ensures Revit groups remain lightweight, easy to manage, and supportive of collaborative BIM workflows throughout the project lifecycle.
Conclusion
As BIM technology advances, we can expect a surge in the development of more sophisticated and customisable Revit families and groups. This dynamic growth is driven by the demand for higher precision, efficiency, and detail in building designs. This trend not only enhances the accuracy and realism of BIM models but also streamlines the process of material selection and procurement, impacting the realisation of the project at large.
If you wish to use Revit to your advantage, learning how to smartly use Revit families and groups would be a wise idea. To achieve that, we suggest you explore the BIM Professional Courses offered by Novatr. These courses demonstrate Revit features, workflows, and applications while showcasing the best practices for real-world projects. The courses are further bifurcated into two categories; one for architects and the other for civil engineers to ensure the imparting of industry-specific knowledge to learners.
Explore the courses today!
BIM Professional Course for Architects
BIM Professional Course for Civil Engineers
For more insights into what’s brewing in the AEC industry, visit our Resources page.
FAQs
1. How do Revit families and groups influence clash detection?
Well-organised families and groups improve model clarity, making clashes easier to detect and resolve. Poor organisation increases false conflicts and coordination errors, especially in large multidisciplinary BIM projects.
2. When should I use a Revit group instead of a family?
Revit groups are best for repeated layouts within a single project, while families are better for reusable components across projects. Choosing correctly improves control, performance, and long-term scalability.
3. How do Revit groups affect model performance?
Complex or nested groups can slow down Revit models by increasing processing load. Keeping groups simple and limited helps maintain faster performance and smoother collaboration.
4. What are the best practices for naming Revit families?
Clear, consistent naming should include category, type, and function. This helps teams locate elements quickly, reduces errors, and supports better scheduling and coordination.
5. Can poorly organised Revit groups slow down BIM models?
Yes, unused or overly complex groups add unnecessary data to the model. This increases file size, slows syncing, and affects overall BIM workflow efficiency.
.jpg)
Understand how BIM can help your career!
Speak with an Expert Now!

.png)


.jpg)